My emergency contacts
Use these procedures to manage your emergency contacts in MyPortal.
Employee header information in the My Emergency Contacts module comes from the State of Washington central payroll system, the Human Resource Management System (HRMS). If you have questions around this data or need to request an update, contact your Human Resources office.
Create emergency contacts
Use this procedure to create your emergency contact information.
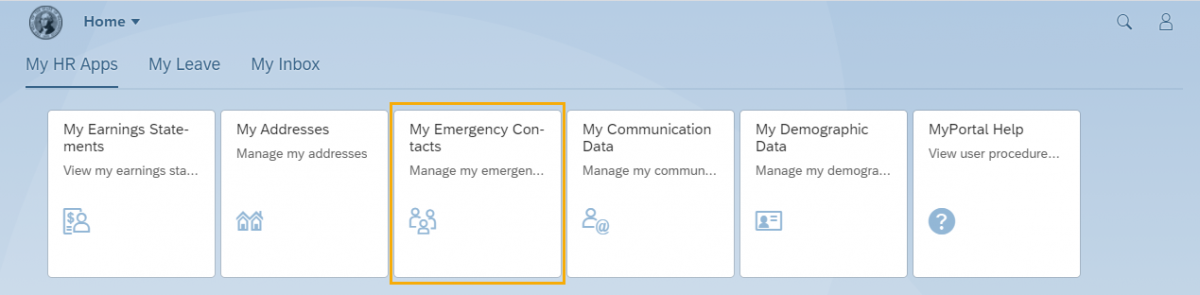
Step 1
Click the My Emergency Contacts tile.
Step 2
Click the Create button.
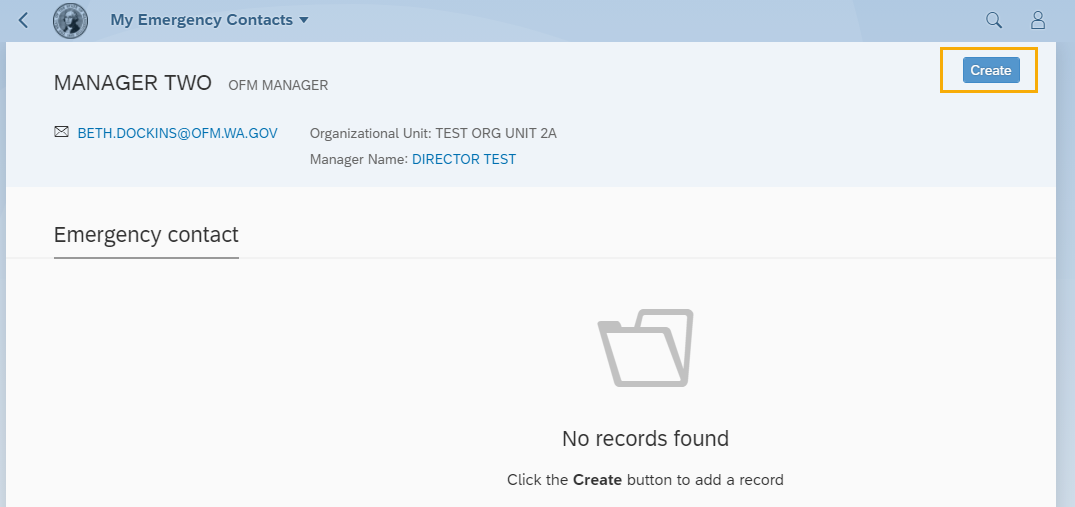
Tip: Employees who are not the leave approvers will not see a manager name displayed in the header below Organization Unit.
If a manager’s position is double filled, the manager name displayed on the header may not be an employee’s direct manager. Contact your manager or HR/Payroll office at HereToHelp@ofm.wa.gov for questions.
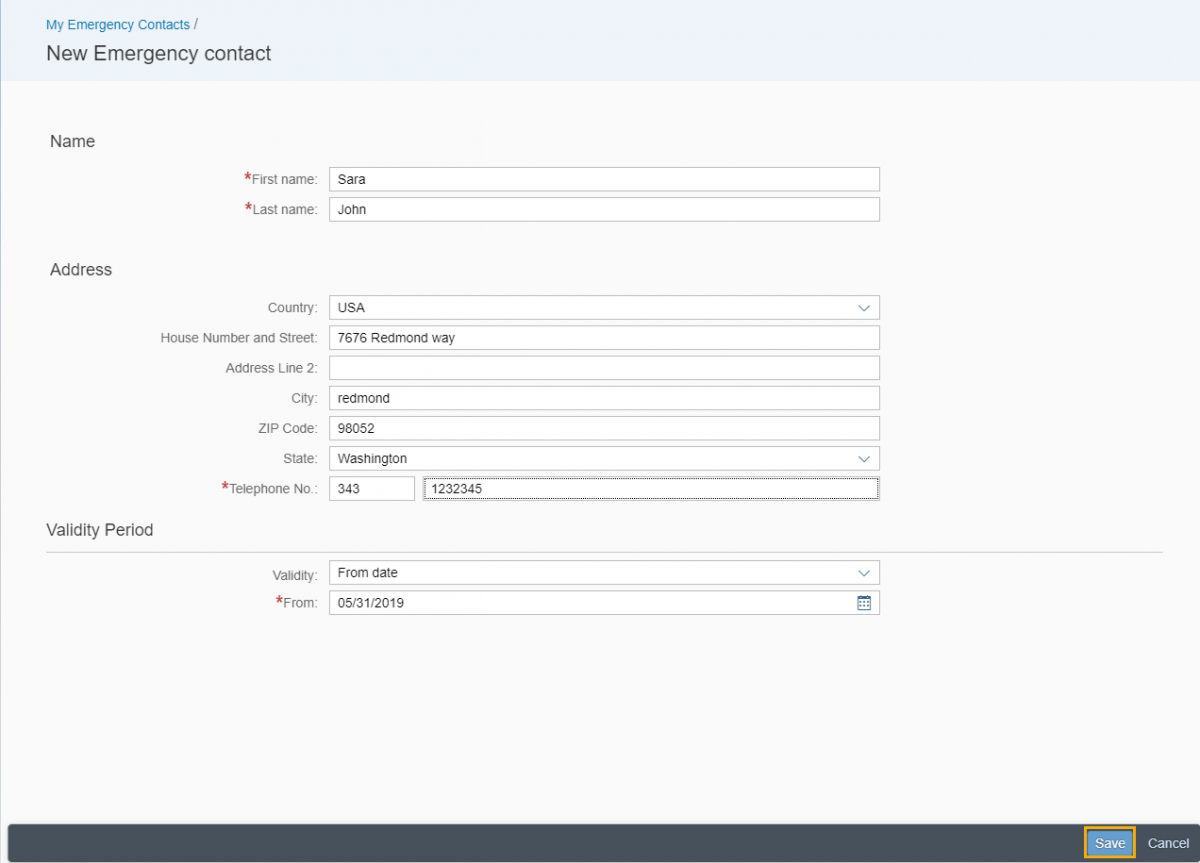
Step 3
Enter the following mandatory fields and click the Save button:
- First Name
- Last Name
- Telephone Number (e.g.: XXX XXXXXXX)
The following fields are optional:
- Country
- House Number And Street
- Address Line 2
- City
- ZIP Code
- State (state options will be populated based on the country selection)
The following fields will default:
- Validity – Your emergency contact information will be effective from this date forward. Default value of this drop down is From Date. There is another value in this drop down which is “From Date to Date”
- From – This is the effective date for your emergency contact
- To – This is the end date for your emergency contact
Tip: All Dates are in mm/dd/yyyy format.
Do not use your information from your browser cache to populate the address fields.
A “Record saved” message will confirm the Emergency Contact information has been saved and you will be returned to the Emergency Contact page.
Tip: When selecting a Validity Period using the “From date to date” option from the Validity dropdown, the To date will default to 12/31/9999. If you want to change the To date, you will need to manually enter the date rather than using the Calendar option since the Calendar will default to the year 9999. The address update is effective the following day or can be dated for the future. No current day or retro dates allowed.
When entering an Emergency Contact address, select a Country first. This will ensure the State list displays USA states only. The Country field does not default to USA since an emergency contact could be outside the United States.
Once you select a country, you must enter all address fields. Do not select the information from the browser (if your browser has stored your information). You will see an error if any in the lower right corner of the page.
The Telephone No. field will accept formats other than (###)###-#### since emergency contact numbers could be outside the United States.
You may receive a system notification due to missing or incorrectly formatted fields. To view the system notifications list click on the message button on the bottom left corner of your form.
You can create multiple emergency contacts.
Edit emergency contacts
Use this procedure to edit your emergency contact information.
Step 1
Click the My Emergency Contacts tile.

Step 2
Click the Edit button.
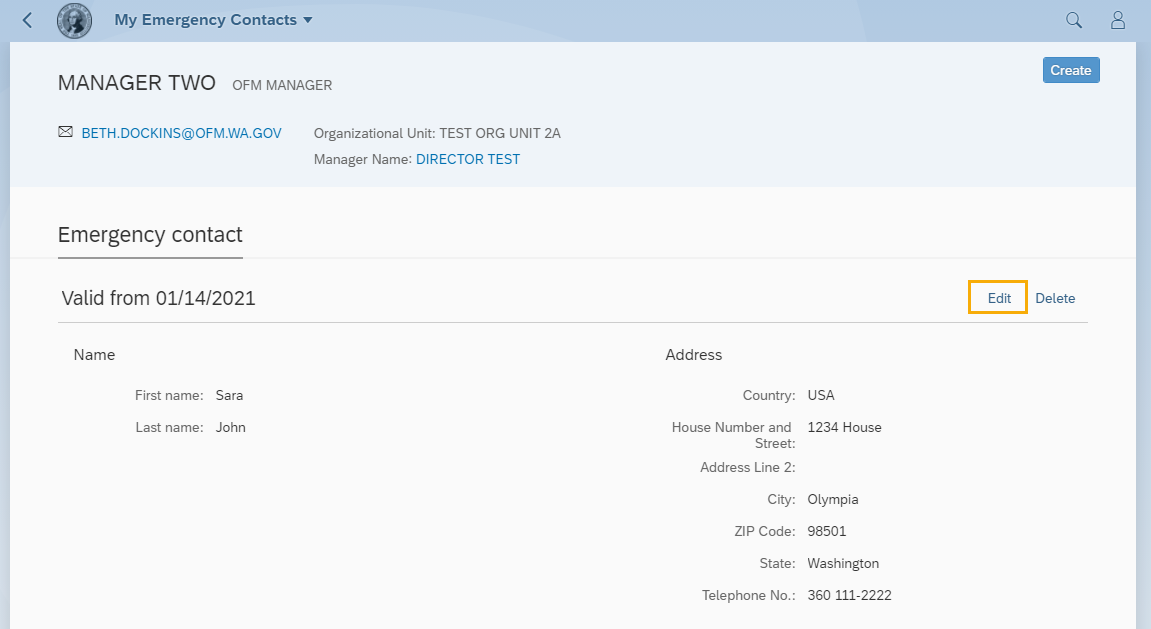
Tip: Employees who are not the leave approvers will not see a manager name displayed in the header below Organization Unit.
If a manager’s position is double filled, the manager name displayed on the header may not be an employee’s direct manager. Contact your manager or HR/Payroll office at HereToHelp@ofm.wa.gov for questions.
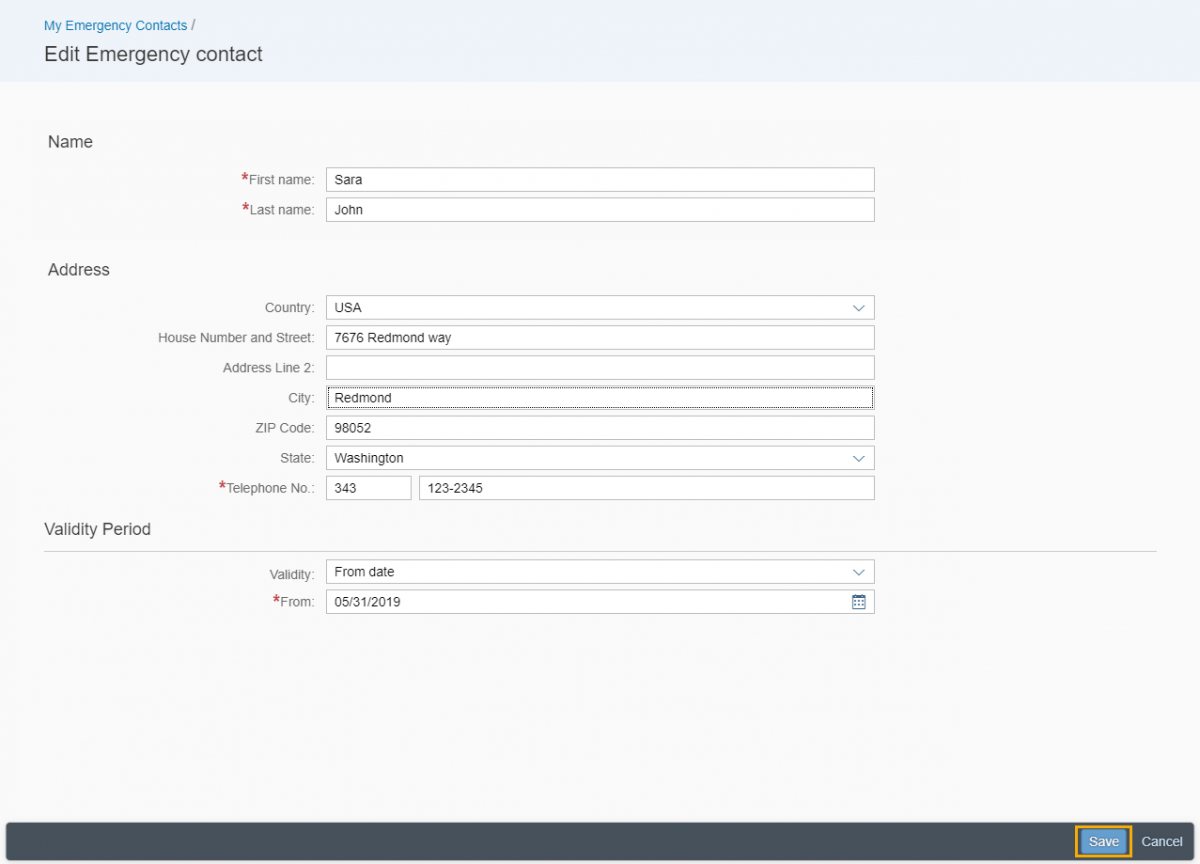
Step 3
Enter the following mandatory fields and click the Save button:
- First Name
- Last Name
- Telephone Number (e.g.: XXX XXXXXXX)
The following fields are optional:
- Country
- House Number And Street
- Address Line 2
- City
- ZIP Code
- State – (state options will be populated based on the country selection)
The following fields will default:
- Validity – From Date dropdown list option. This indicates your emergency contact will be effective from the date in the From field going forward.
- From – Next day’s date. This is the effective date of your emergency contact.
Tip: All Dates are in mm/dd/yyyy format.
Do not use your information from your browser cache to populate the address fields.
A “Record saved” message will confirm the Emergency Contact information has been saved and you will be returned to the Emergency Contact page.
Tip: The address update is effective the following day or can be dated for the future. No current day or retro dates allowed.
When entering an Emergency Contact address, select a Country first. This will ensure the State list displays USA states only. The Country field does not default to USA since an emergency contact could be outside the United States.
Once you select a country, you must enter all address fields. Do not select the information from the browser (if your browser has stored your information). You will see an error if any in the lower right corner of the page.
The Telephone No. field will accept formats other than (###)###-#### since emergency contact numbers could be outside the United States.
You may receive a system notification due to missing or incorrectly formatted fields. To view the system notifications list click on the message button on the bottom left corner of your form.
Delete emergency contacts
Use this procedure to delete your emergency contact information.
Step 1
Click the My Emergency Contacts tile.

Step 2
Click the Delete button to delete an emergency contact.
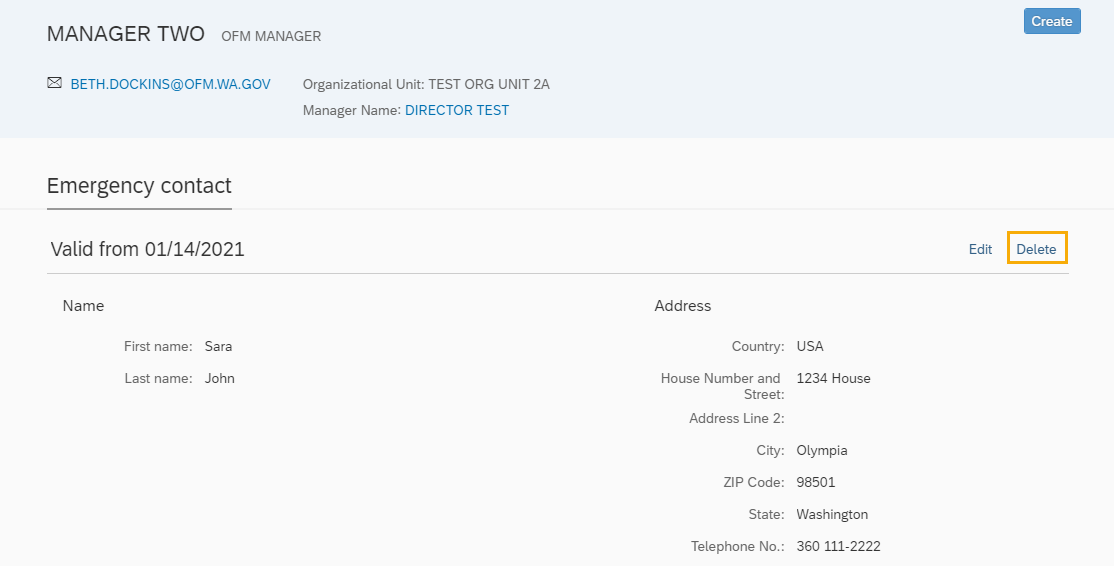
Tip: Employees who are not the leave approvers will not see a manager name displayed in the header below Organization Unit.
If a manager’s position is double filled, the manager name displayed on the header may not be an employee’s direct manager. Contact your manager or HR/Payroll office at HereToHelp@ofm.wa.gov for questions.
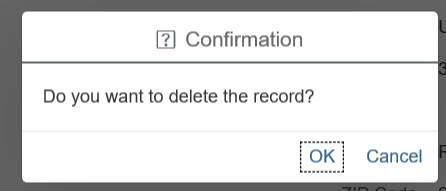
Step 3
Click OK to delete the emergency contact or Cancel to cancel the delete request and return to the Emergency Contacts screen.