


My settings and app finder
In This Section
Home page
Home page
Use this procedure to manage the Home Page settings.
Step 1
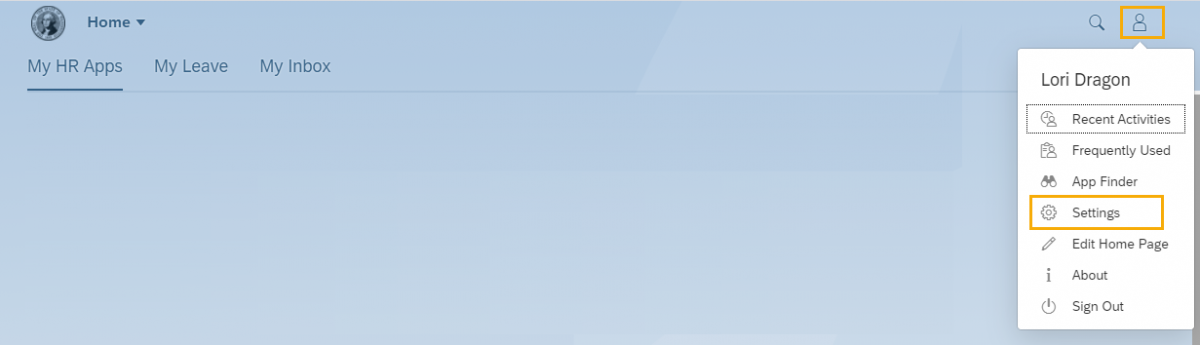
Click the Profile icon and select Settings from the dropdown.

Step 2
Click Home Page to choose how you want to display your links and tiles on the MyPortal Home Page.
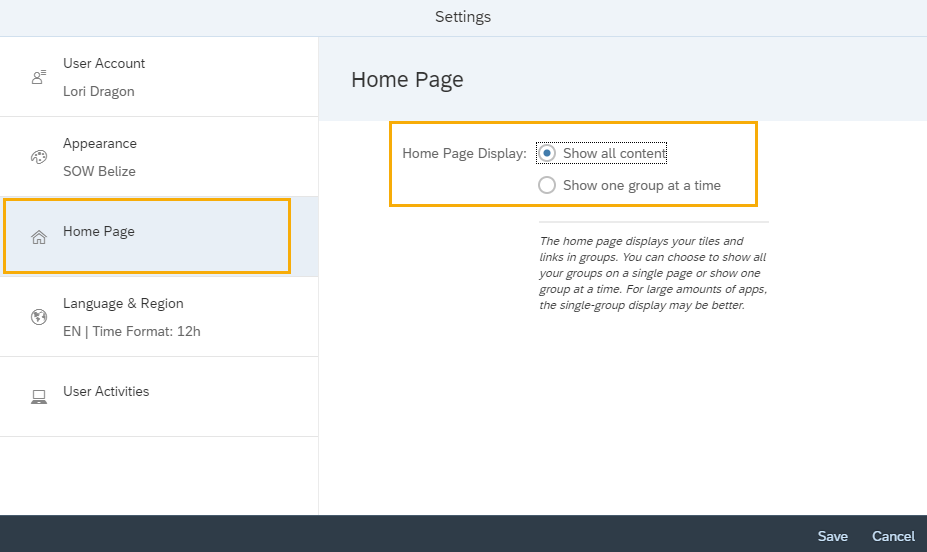
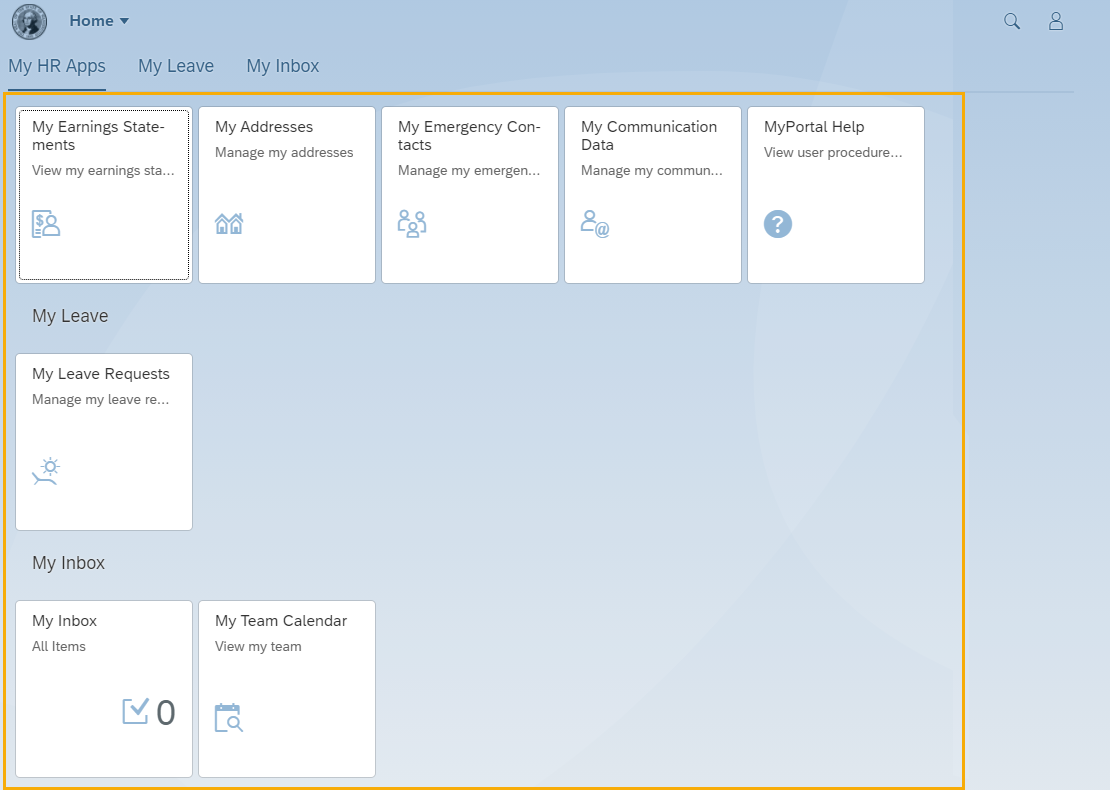
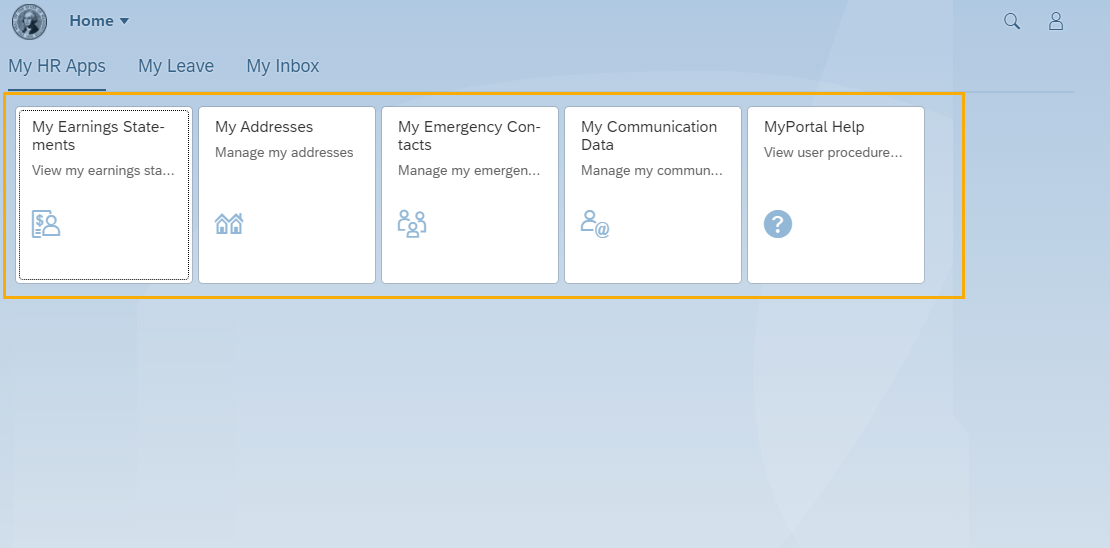
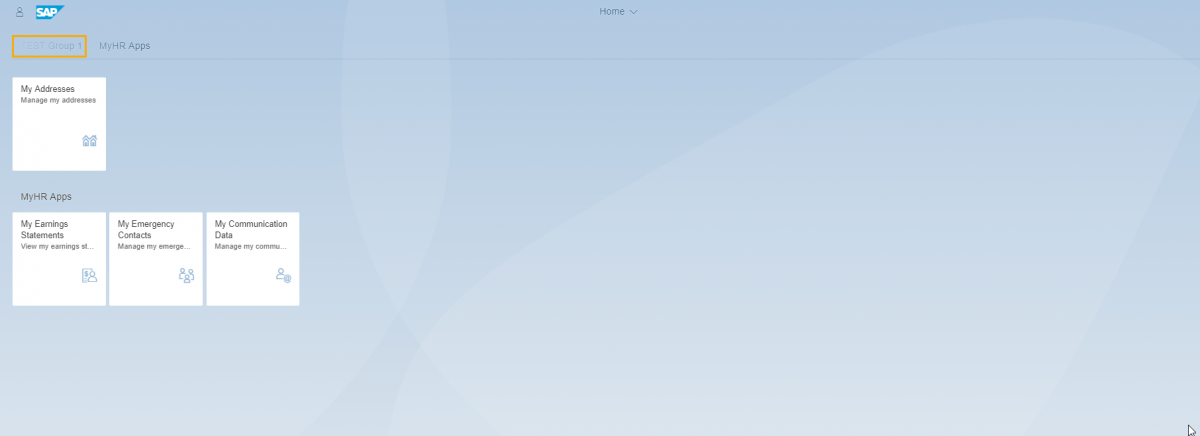
Show all content will display all links and tiles together on the Home Page.
Show one group at a time will display links and tiles in their respective groups. You can click on the group tabs to display group contents.
MyPortal currently has one group – MyHR Apps. You can create your own groups and organize your links and tiles within those groups. See MyPortal – Edit Home Page for more information on creating groups.
Step 3
Click Save to apply changes to the Home Page settings or Cancel. You will be returned to the Home Page.

Edit home page
Edit home page
Use this procedure to add customized groups to the Home Page.
Step 1
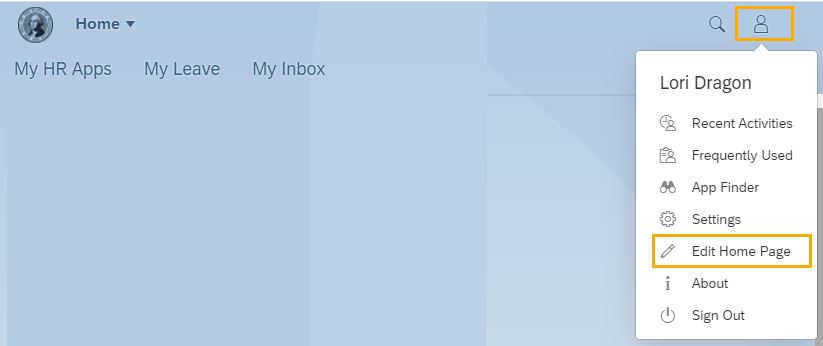
Click the Profile icon and select Edit Home Page from the dropdown.
Step 2
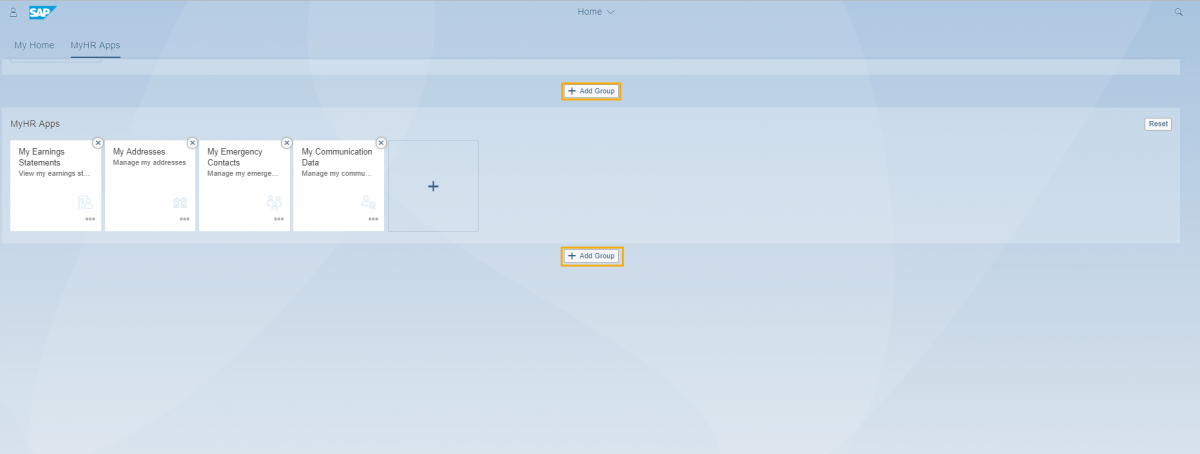
Click Add Group.
Step 3
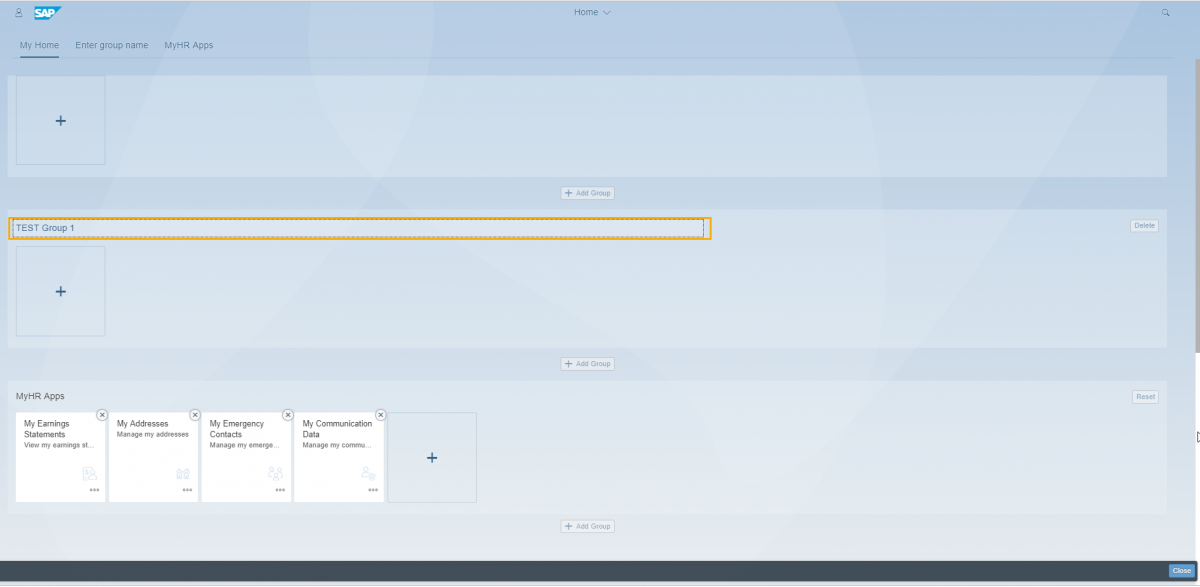
Enter a Group Name.
Step 4
Drag tiles onto the plus sign box in the new group or click the plus sign in the new group to add tiles using the App Finder. Click Close when all tiles have been added.
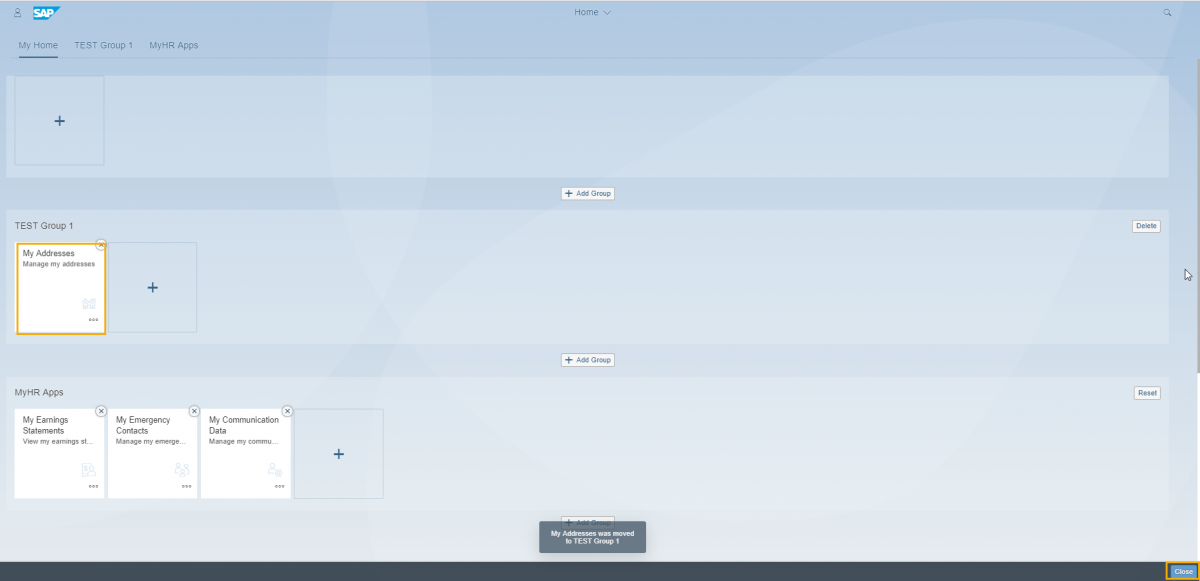
Your changes will be saved and you will return to the Home Page where the new group and tiles will be displayed.
Depending on the Home Page layout setting referenced in the MyPortal – Settings – Home Page user procedure, your Home Page layout will display in two different ways.
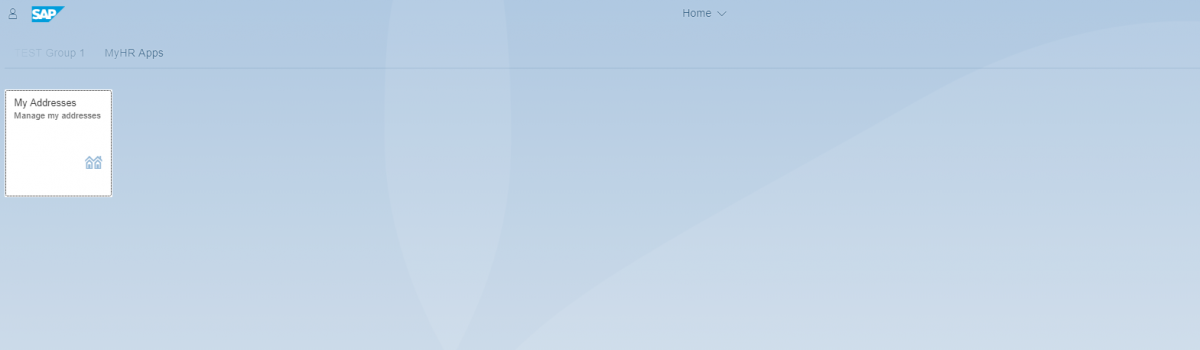
If Show all content is selected, your Home Page will display all links and tiles together on the Home Page.
If Show one group at a time is selected, your Home Page will display links and tiles in their respective groups. You can click on the group tabs to display group contents.
Step 5
You can change the title and subtitle of a tile by clicking the ellipses and selecting Edit Tile Information.

Enter the tile’s new Title and/or Subtitle and click OK.
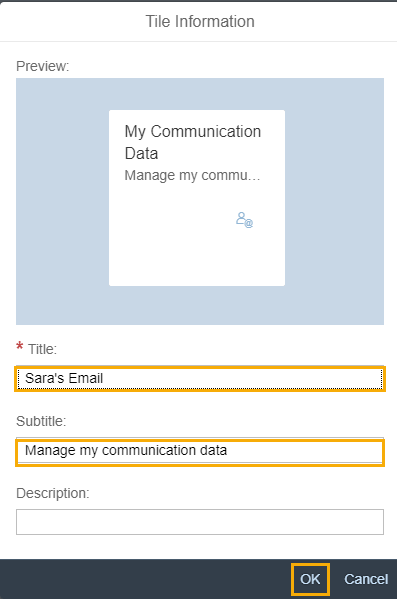
Your tile’s new Title and Subtitle will be displayed on the MyPortal Home Page.

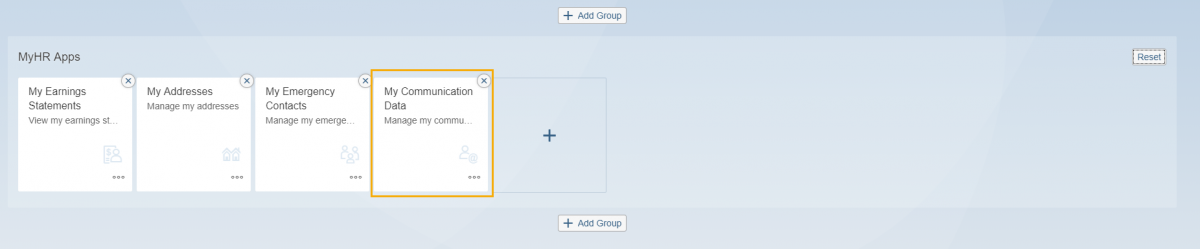
You can reset any changes you have made to the tiles in a group by clicking the Reset button. In the example below, the default My Communication Data tile has been renamed to “Sara’s Email”.

At the confirmation box asking if you’re sure you want to reset the group, click Reset again.

The tiles will return to their default values.
Appearance
Appearance
Use this procedure to manage Appearance settings.
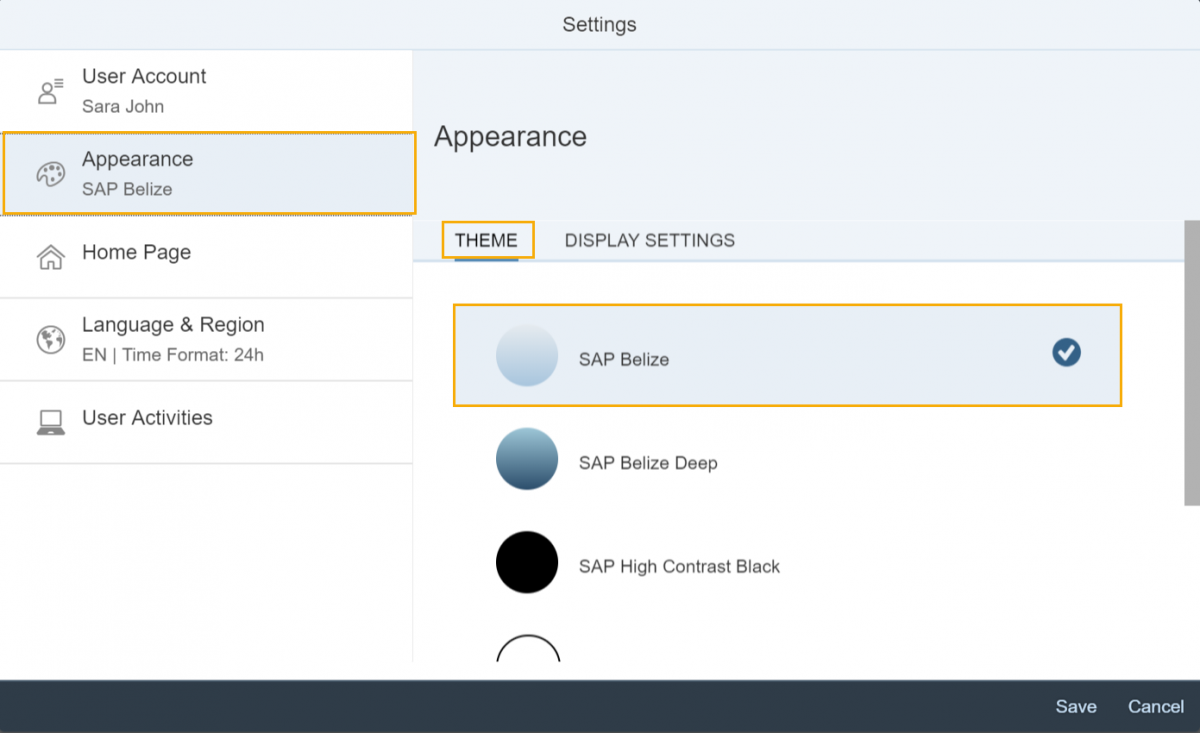
Step 1
Click the Profile icon and click on Settings.

Step 2
Click Appearance and select Theme (this is the default selection). Select a new display theme.
The default theme is SAP Belize.
The system allows for users to customize the look and feel, including several high contrast themes that may assist with accessibility.
You have the option to save your theme setting by clicking the Save button.
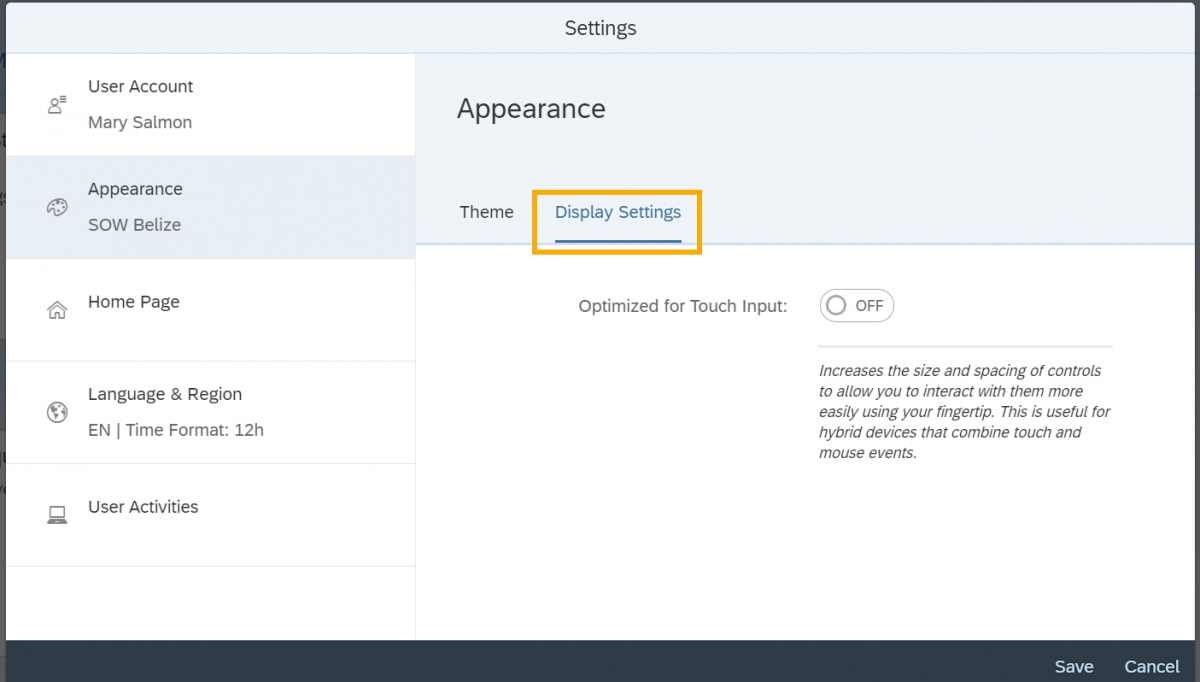
Step 3
Click Display Settings to turn optimization for touch input on or off.
Step 4
Click Save to apply Appearance settings or Cancel. You will be returned to the Home Page.

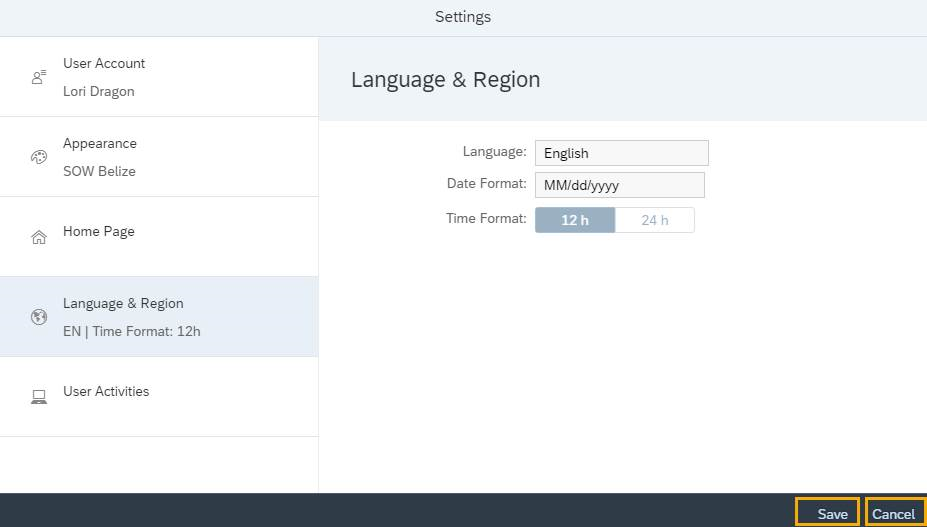
Language & region
Language & region
Use this procedure to view Language & Region settings.
Step 1
Click the Profile icon and select Settings from the dropdown.
Step 2
Click Language & Region to view the default Language, Date Format and Time Format.
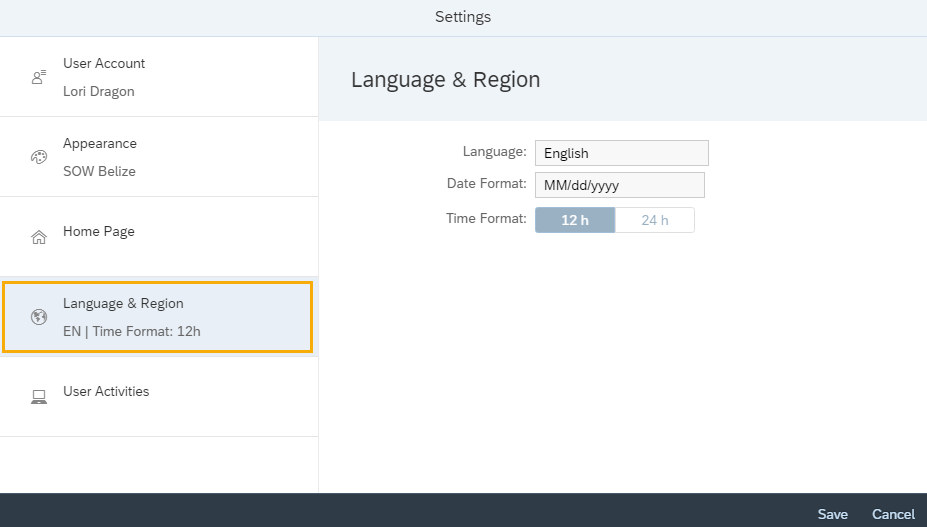
Step 3
Click Save or Cancel to exit settings and return to the Home Page. Note: Language & Region settings cannot be updated. Only changes made to other setting options will be saved when the Save option is selected.
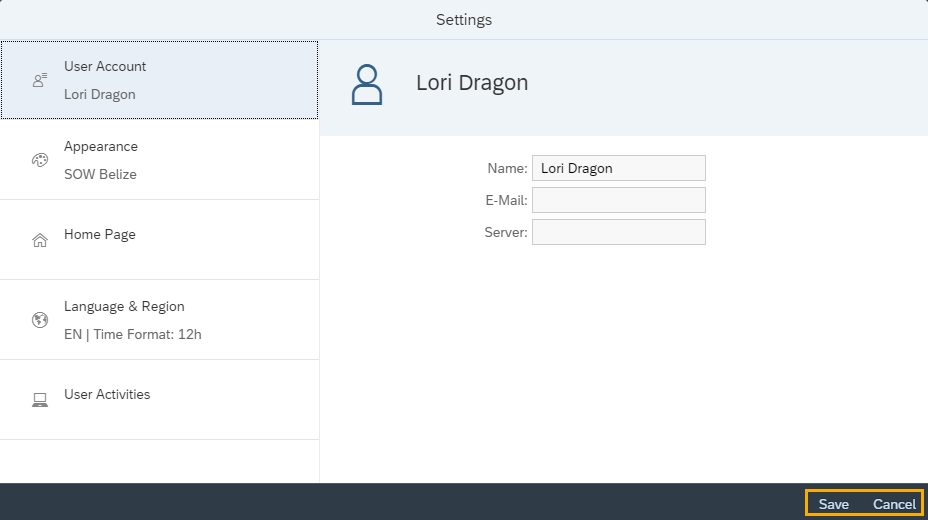
User account
User account
Use this procedure to manage User Account settings.
Step 1
Click the Profile icon and select Settings from the dropdown.

Step 2
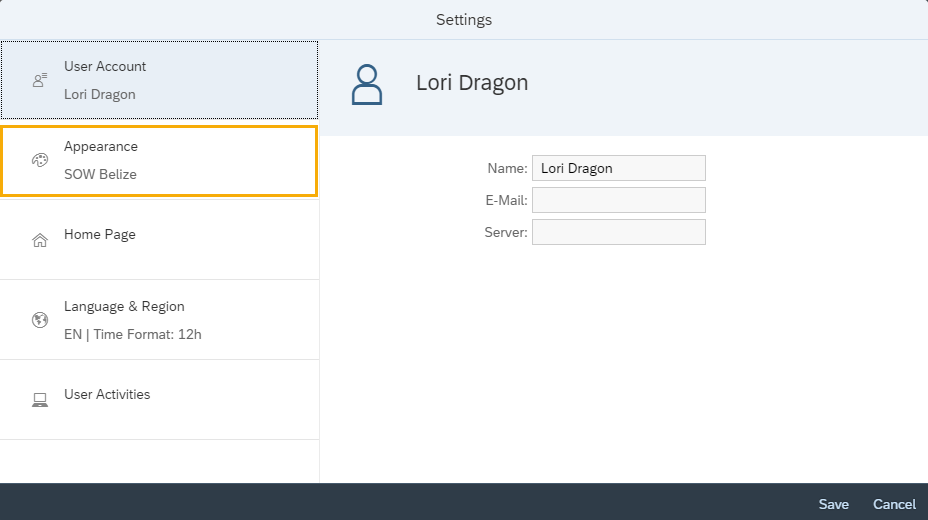
Click User Account to display your Name, Email and Server.
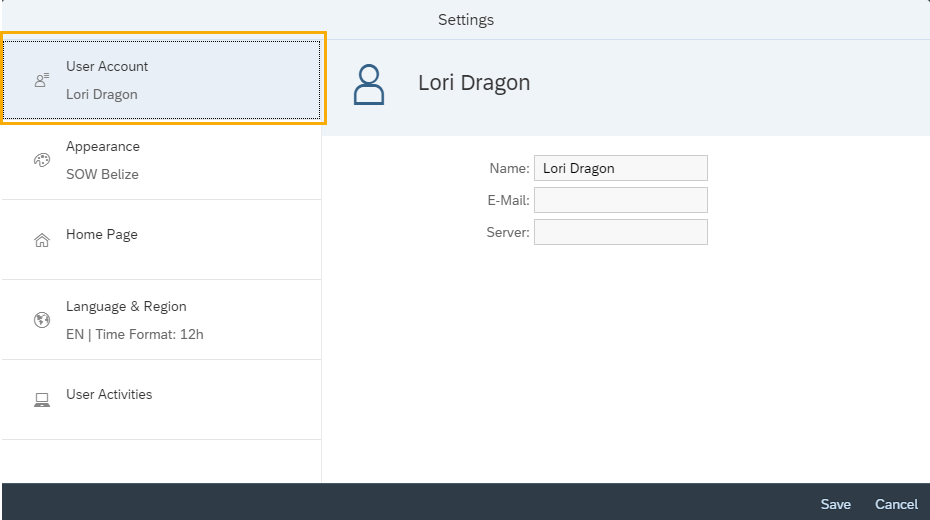
Step 3
Click Save or Cancel to exit settings and return to the Home Page.
User Account settings cannot be updated. Only changes made to other setting options will be saved when the Save option is selected.
E-Mail will be blank for single sign on agencies.
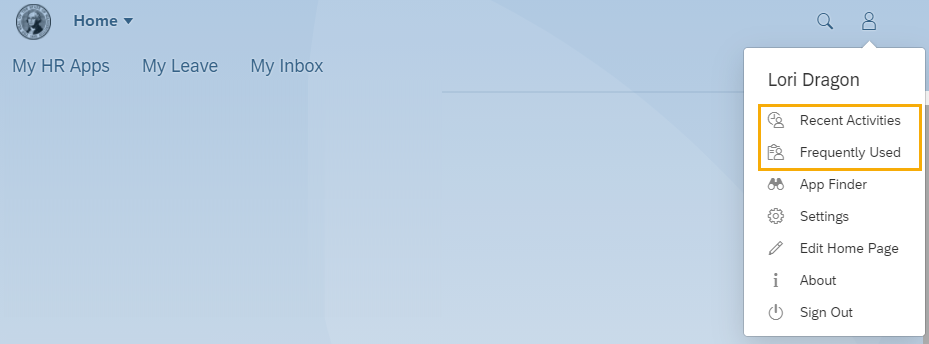
User activities
User activities
Use this procedure to manage User Activities settings.
Step 1
Click the Profile icon and select Settings from the dropdown.

Step 2
Click User Activities and change “Track my recent activity and frequently used apps” to Yes or No. The default setting is YES.
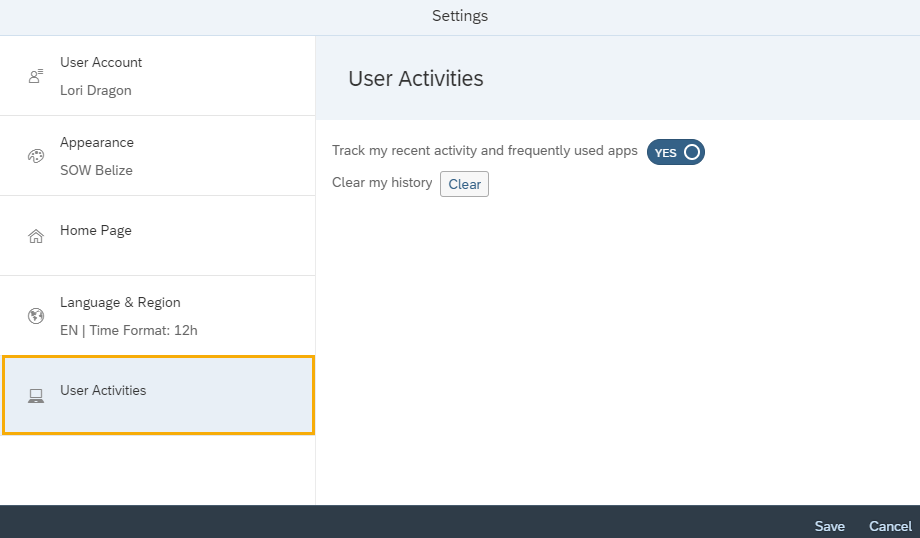
If Yes is selected, Recent Activities and Frequently used apps will display in the dropdown selection under the profile icon.
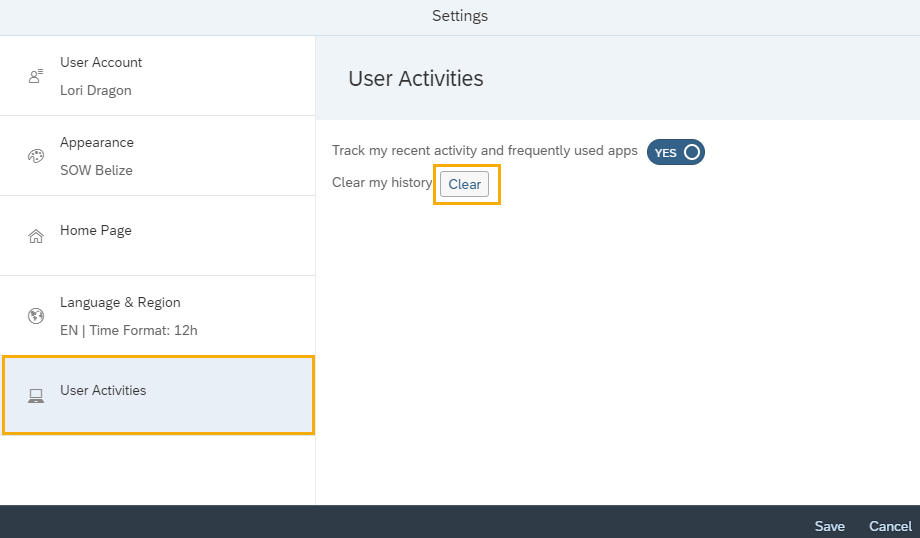
Step 3
To clear the list of recent activity and frequently used apps, click the Clear button on the “Clear my history” option of the User Activities tab – this action cannot be undone.
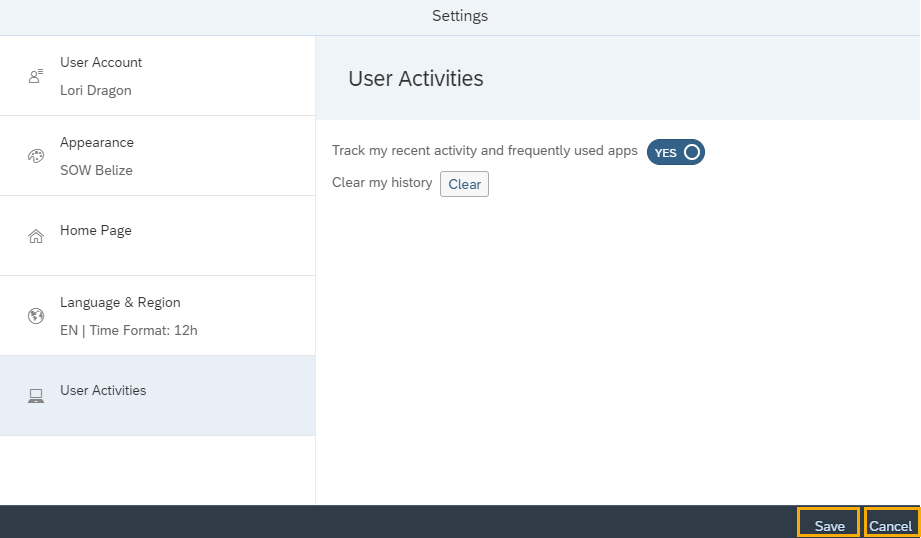
Step 4
Click Save to apply changes to the User Activities settings or Cancel. Note: You cannot cancel changes to the Clear my history option once you click the Clear button.
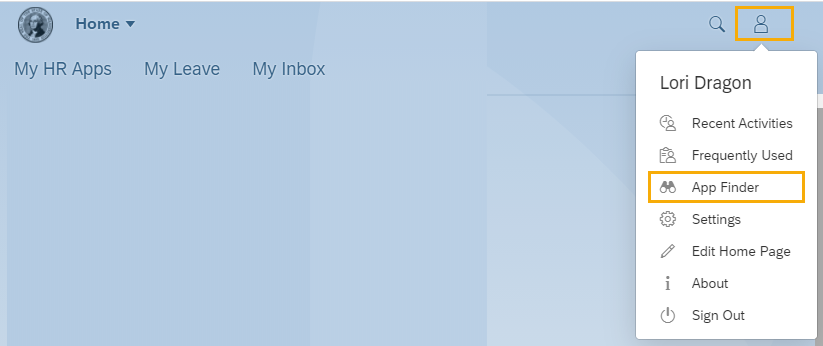
App finder
MyPortal – app finder
Use this procedure to find application tiles.
Step 1
Click the Profile icon and select App Finder from the dropdown.
Step 2
Enter application search term in the “Search in Catalog” box and hit Enter on the keyboard. Relevant applications will be displayed in the App Finder results.
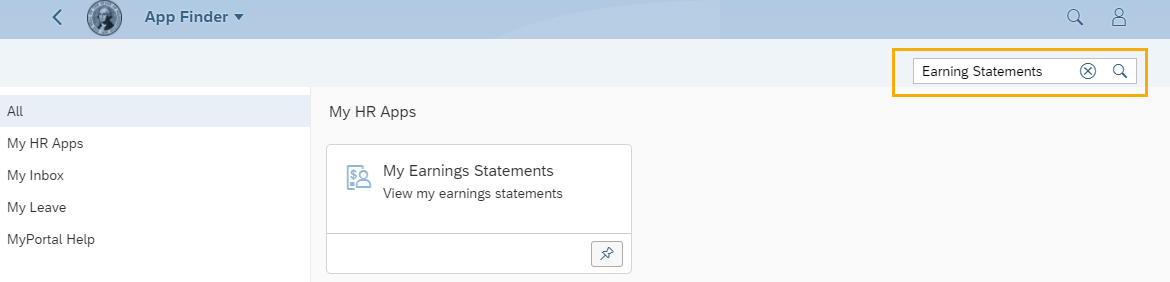
Use the pin button to pin the app to your home page.