My leave requests
Use these procedures to manage your leave requests in MyPortal.
In This Section
Submit or display leave request
Use the My Leave Requests tile to create a new leave request or to display leave requests that have already been submitted.
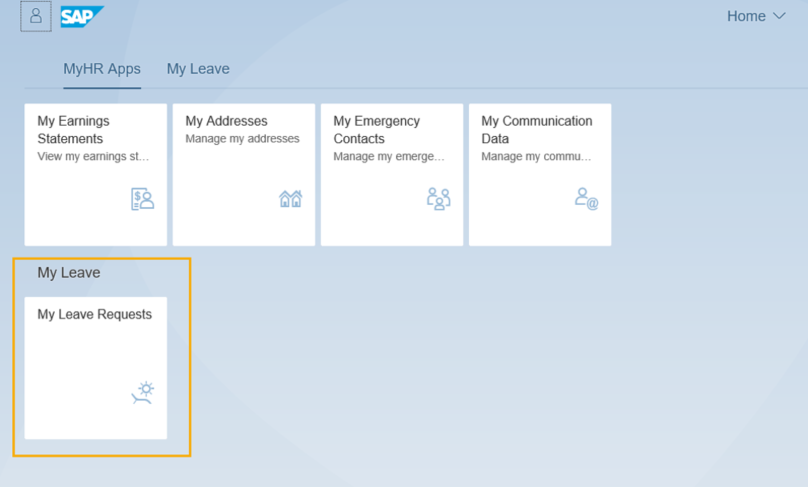
Step 1
Select the My Leave Requests tile from your home page or My Leave tab.
Tip:You can submit a leave request up to six months after leave was taken and/or up to 12 months in advance of taking leave. For LWOP leave requests, you can only enter 30 days in the past or up to 12 months in the future. If you need to submit a leave request older than six months or more than 12 months in advance, contact your Human Resources office.
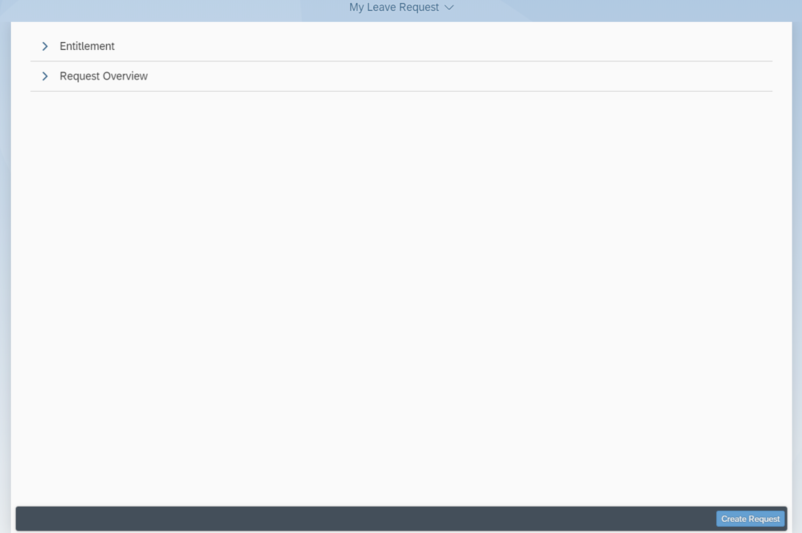
Step 2
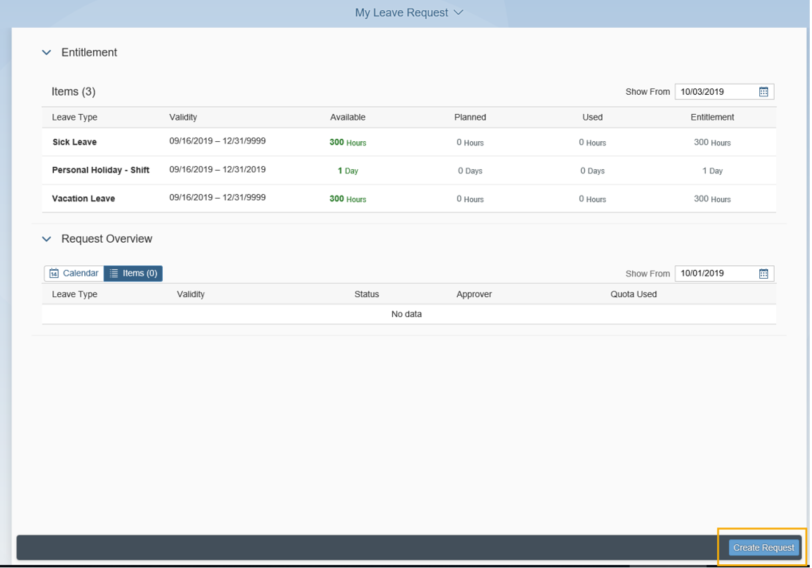
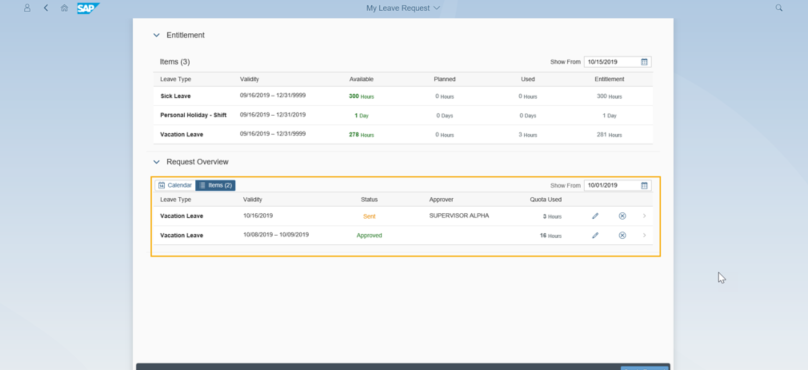
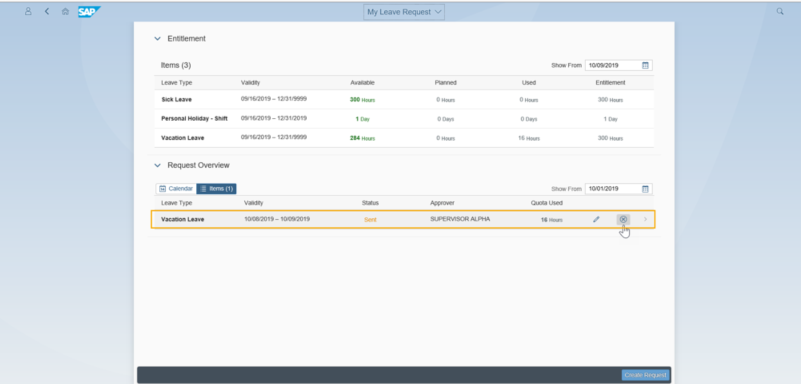
To review your current leave entitlement balances and/or your current requests, expand the Entitlement or Request Overview sections.
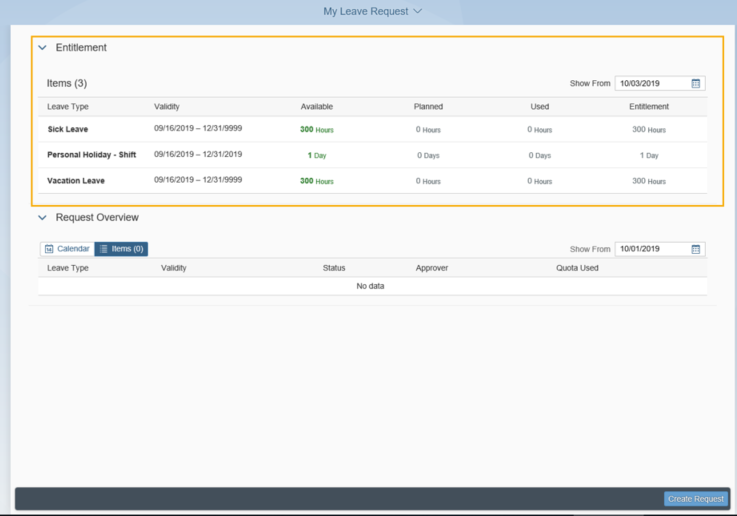
The Entitlement section displays the available types of leave and their balances. For example, if you have already used your Personal Holiday, it will not display since the balance is zero.
- Show From – Defaults to the current day and displays leave types and leave entitlements that are valid from the Show From date forward
- Leave Type – Type of leave you are entitled to
- Validity – Effective dates of your leave type
- Available – Displays how much leave is available after all submitted requests have been deducted from the entitlement
- Planned – This column is not used currently
- Used – Future leave that is approved and posted plus any leave in sent or approved status
- Entitlement – Your leave balance up to and including the current day – the balance includes leave earned and approved since the last payroll; however it does not include future dated leave
Tip: You cannot submit a leave request if it exceeds your available balance.
Accruals for salaried employees are generally available by the 16th (payroll day 1) of each month. For more information about leave accruals (including dependencies on the eighty-hour requirement), reference WA Chapter 357-31 (Holidays and Leave/Washington Administrative Code). Payroll calendar/schedule information is available on the HRMS Support Hub Resources page.
Balances for leave types in MyPortal will not match your Earnings Statement. MyPortal displays current balances and your Earnings Statements display balances based on a specific payroll cycle.
Entitlements are updated when leave is submitted.
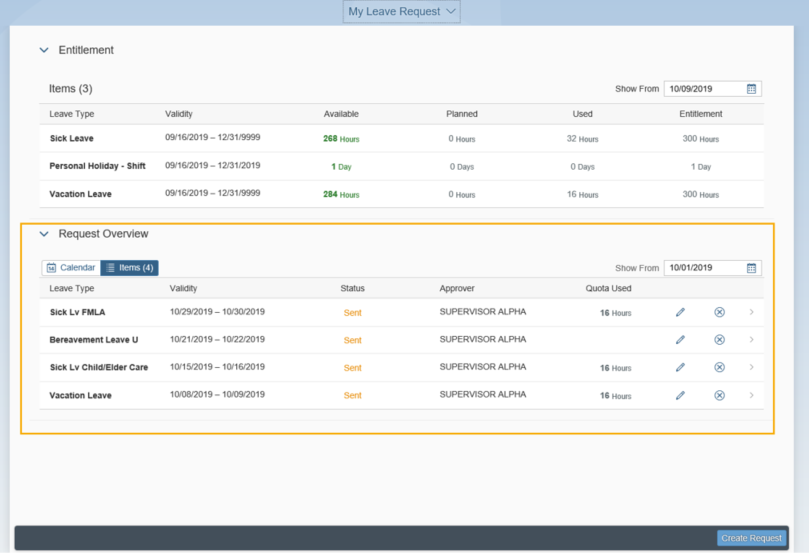
The Request Overview section displays leave that has been submitted by leave type and the status of the leave.
Two tabs are available in the Request Overview; Calendar and Items. The Calendar tab displays leave and leave status information in a calendar view. The Calendar legend identifies the status of the request and you can hover over the calendar day to display the leave type selected.
The Items tab displays leave and leave status information in a table format:
- Show From – Defaults to the current day and displays leave types and leave entitlements that are valid from the Show From date forward
- Leave Type – Type of leave that was requested
- Validity – Effective dates of your leave requests
- Status – Status of the leave request (Sent, Approved, Rejected)
- Approver – Authorized approver
- Quota Used – Number of hours or days requested if applicable (some leave types will not have Quota Used amounts such as Bereavement Leave or Inclement Weather)
Step 3
Click the Create Request button to create a new leave request.
Tip: You can also create a new leave request by selecting a date or dates on the Calendar view in the Request Overview section and selecting Create Request (navigate through months using the calendar arrows).
You cannot scroll back farther than the Show From date in the Calendar view.
You can do a single click on the first date and single click on the last date of leave on the calendar to select multiple dates. Do not click and drag.

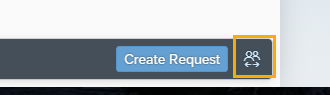
If you are a concurrent employee, you will see an additional icon next to Create Request button. This will allow you to switch to your other personnel number to submit a leave request without having to log out of the account you are currently in.
Step 4
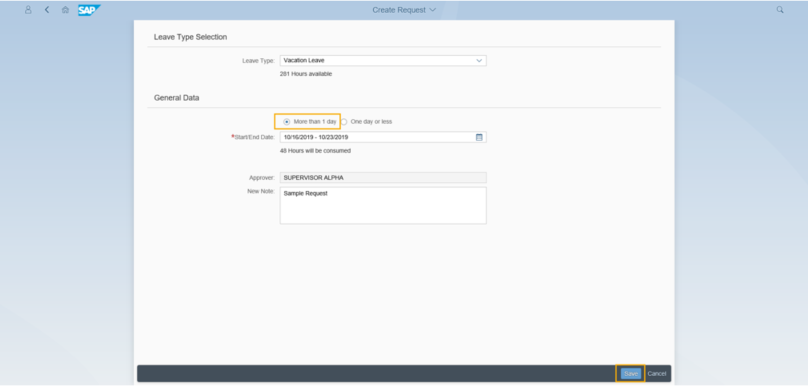
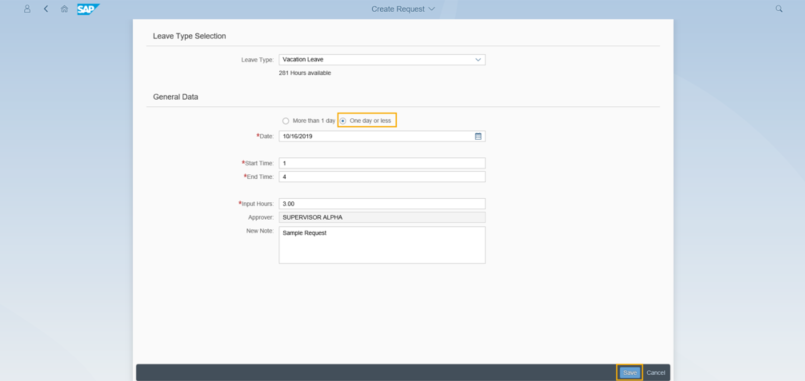
Fill in the Leave Request Form and click Save.
Note: clicking Save will send your request to the Approver but you can still edit or delete it by following the Change or Delete Leave Request User Procedures.
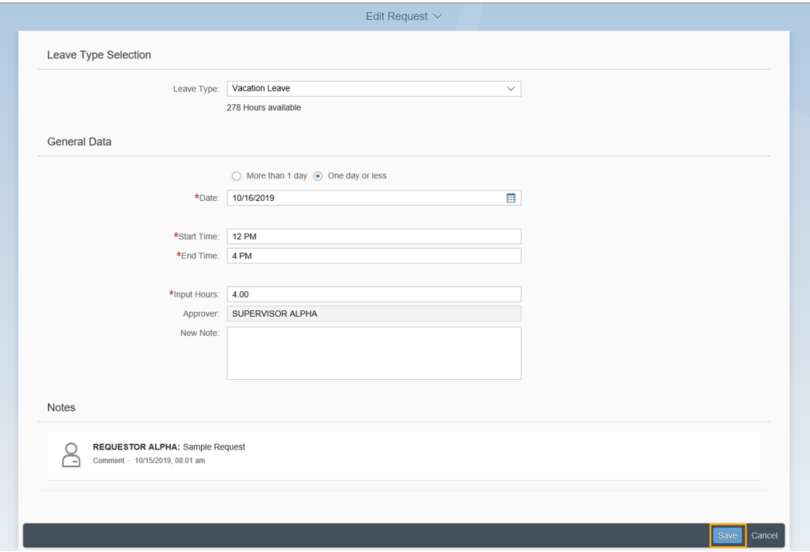
The following Leave Request fields are available – an asterisk indicates the field is required:
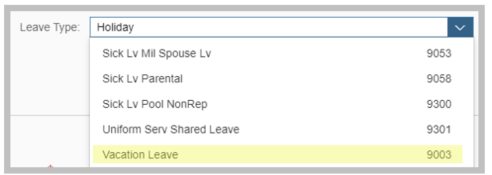
- Leave Type – Select the type of leave you are requesting – the number of leave hours available will be displayed below the Leave Type selected (note: start typing in the dropdown list to quickly navigate to a leave type in the list).
- More than 1 day – Select this option if you are requesting more than one day of leave (default) – see Example 1 below.
- One day or less – Select this option if you are requesting one day or less of leave – include the required Start Time, End Time, and Input Hours – see Example 2 below.
- Date – If One day or less is selected, enter the Date you will be taking leave.
- Start/End Date – If More than 1 day is selected, enter the date range of the leave taken. Note: number of hours taken will automatically be calculated based on your work schedule; however, hours taken are not calculated if one day or less is selected.
- Start Time (if applicable) – If One day or less is selected, enter the time you will begin taking leave. This field can be in alphanumeric format (e.g.: 1:00 PM, 4:30 PM).
- End Time (if applicable) – If One day or less is selected, enter the time your leave will end. This field can be in alphanumeric format (e.g.: 1:00 PM, 4:30 PM).
- Input Hours (if applicable) – If One day or less is selected, enter the total hours you will be on leave. You can only enter partial hours to the tenth.
- Approver – Read only field that is automatically populated with the authorized leave approver name based on the agency’s organizational structure.
- New Note – Follow your agency procedures to provide additional information, your approver may require, such as reason for leave.
Example 1 – More than 1 day:
Example 2 – One day or less:
Tip: Leave cannot be requested more than 12 months in advance.
If the Approver is not correct, contact your HR/Payroll office.
Leave Type text and number will not be the same as the Earnings Type number and text on the Earnings Statement.
When you tab, the cursor will go to Cancel if you do not put a date in the date field. All other fields are grayed out until you enter a date. Once you enter a date and hit tab, you will be taken to the Start Time field.

You will receive an error message if you input an amount of time that exceeds your scheduled work hours.
If you receive an error message that leave is not available even though the Entitlement section indicates you have a balance, you may be trying to submit a leave request that exceeds your leave balance as of a specific date. For example, your vacation leave balance on February 27 shows that you have 8 hours of leave available and you try to submit a vacation leave request for February 9. You might get an error message because the 8 hours of vacation leave became available to you based on accruals that happened after February 9. If your available vacation leave balance was less than 8 hours on February 9, MyPortal will not let you submit the request because you had not yet earned (accrued) enough vacation leave.
Once a leave request has posted it can be changed or deleted.
If you change the Leave type when creating a leave request, it will change to “More than 1 day.” If necessary, change to “One day or less”.
Always validate the hours you entered before saving your leave request. In rare instances, the system may change the hours back to your originally entered hours if you happen to update the hours before the system has generated the hours from the original request.
You must submit a separate leave request for each day of leave if you have a 24/7 work schedule. For more information, contact your Human Resources office.
| Work schedule | You want to request leave for these dates. | You will use |
| 24/7 | Vacation leave for 16 hours on two consecutive days. For example, vacation leave for 8 hours on Monday and 8 hours on Tuesday of the same week. | Two leave requests |
| M-F 8am to 5pm | Vacation leave for 16 hours on two consecutive days. For example, vacation leave for 8 hours on Monday and 8 hours on Tuesday of the same week. |
One leave request |
| M-F 8am to 5pm | Vacation leave for 16 hours on two non-consecutive days. For example, vacation leave for 8 hours on Monday and 8 hours on Wednesday of the same week. |
Two leave requests |
| M-F 8am to 5pm | Vacation leave for 2 hours on two consecutive days. For example, you leave work at 4pm on Monday (1 hour) and return to work at 9am on Tuesday (1 hour). |
Two leave requests |
Step 5
You have successfully submitted a leave request.
Tip: Your supervisor will receive an email when you submit or change the leave.
You will receive an email once the Approved leave is processed in HRMS.
The Email program is scheduled to run every hour. In an instance, if your supervisor processes your leave request prior to the email program running, you will NOT receive an email notification.
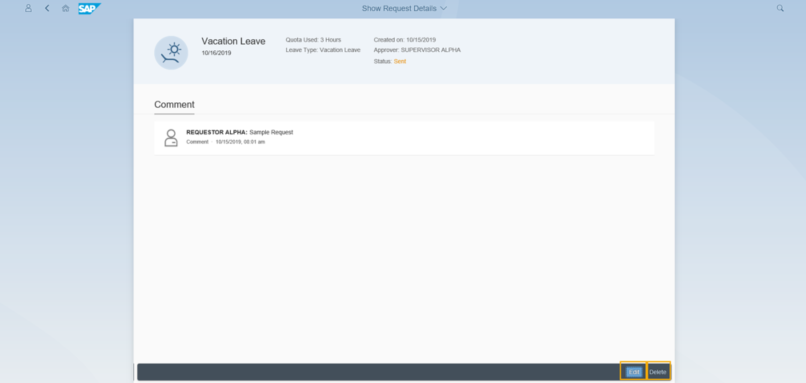
Click on your submitted leave request from the Items Tab in the Request Overview section to see the details of your leave. You can update or delete your submitted leave request by clicking on the Edit or Delete buttons at the bottom of the page.
Change leave request
Use this procedure to update your submitted leave request.
Step 1
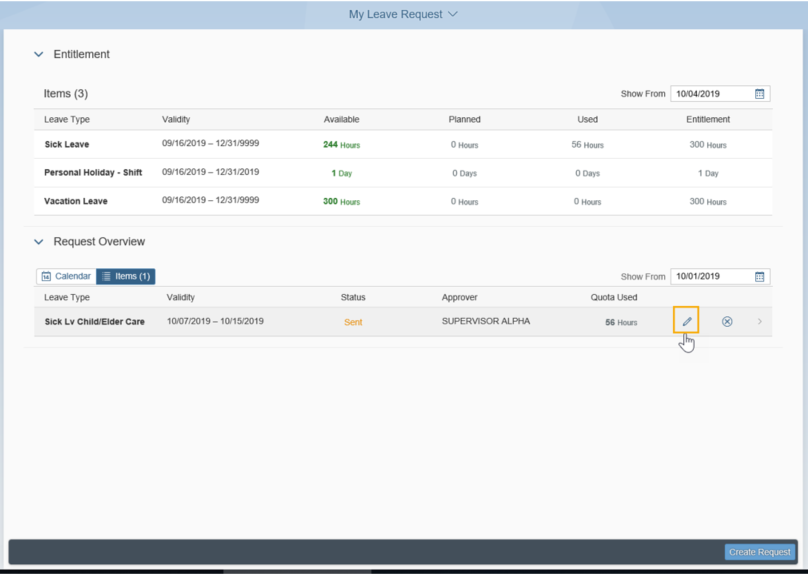
Locate your leave request in the Items table of the Request Overview section of the My Leave Requests page and click the Edit icon. For information on the leave request fields in the Items table, see MyPortal – submit or display leave request.
Step 2
Make changes to your leave request as needed and click Save to submit your updated request.
Step 3
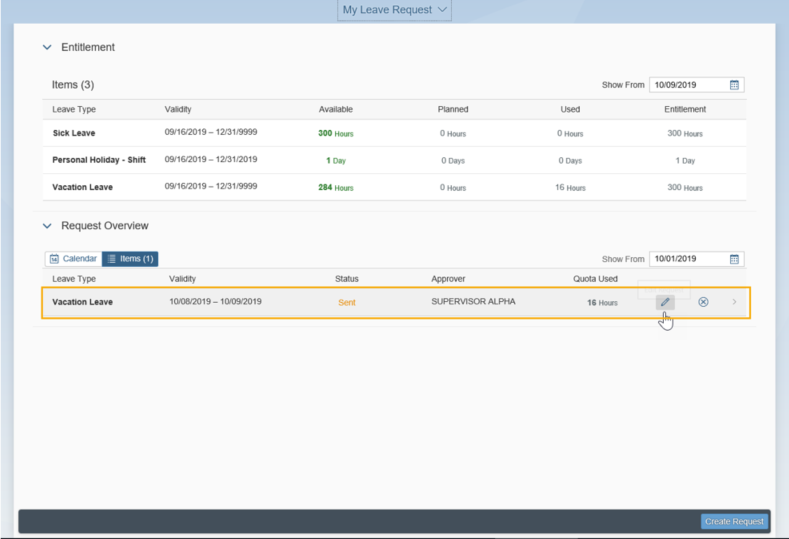
Once your leave request updates have been saved and submitted, you can review your updates in the Items tab of the Request Overview section. You can select the Edit icon to make additional updates if needed or click the X icon to delete the leave request.
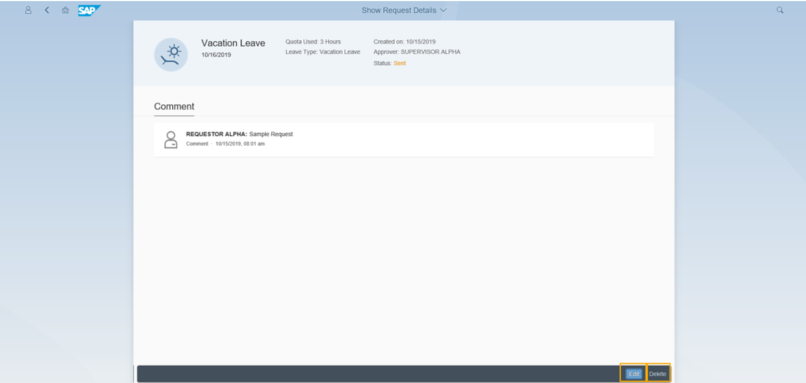
Tip: You may also click on your updated leave request from the Items Tab in the Request Overview section to see the details of your leave. From there you can update or delete your submitted leave request by clicking on the Edit or Delete buttons at the bottom of the page.
If you submitted leave under a previous supervisor and need to change the leave request, request the change as you normally would and the updated request will be routed to your new supervisor for approval.
Delete leave request
Use this procedure to delete a previously submitted leave request.
Step 1
Locate your leave request in the Items tab of the Request Overview section of the My Leave Requests page and click the Delete icon.
Step 2
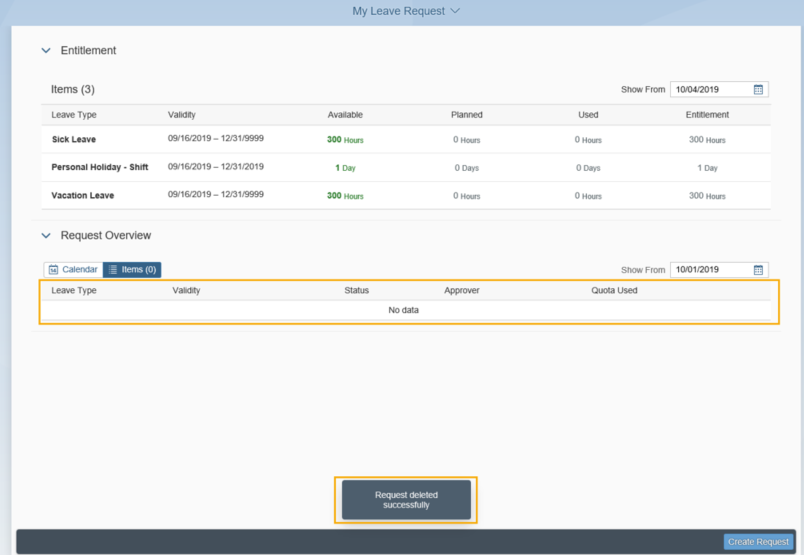
Click OK to confirm you want to delete your leave.

You will see a “Request Deleted successfully” message. If you do not have any pending leave requests you will see No Data in your Request Overview Section.